You can use the Phototheca editing tools to easily make simple changes to your photos, such as rotating them or cropping them to get the best framing.
When you change a photo, Phototheca keeps the original so you can always undo your changes and revert to the original look.
Changes you make to a photo appear everywhere the photo appears in your library—every album, project, and so on.
Edit a photo
- In the Phototheca app, double-click a photo thumbnail, then click Edit in the toolbar.
- Do any of the following:
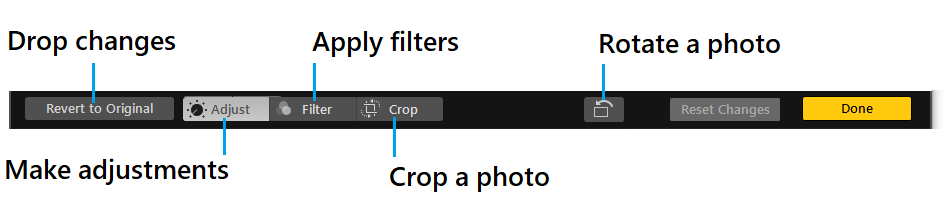
The Edit toolbar showing buttons for making adjustments, adding filters, and cropping photos.
- Zoom in or out on a photo: Rotate mouse wheel to zoom in or zoom out.
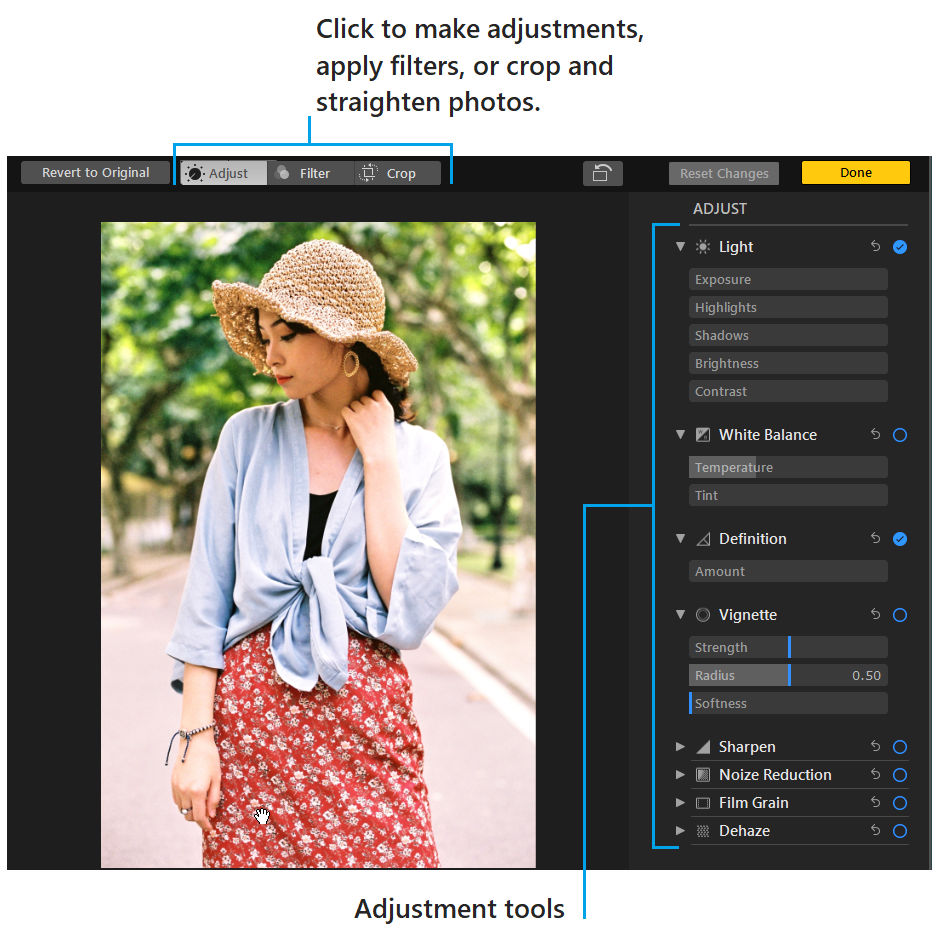
- Make adjustments: Click Adjust to display the adjustment tools. See Adjust a photo’s light, exposure, and more.
- Apply filters: Click Filters to display filters you can apply to change the look of your photo. See Use a filter to change a photo’s look.
- Crop the image: Click Crop to display the options for cropping a photo. See Crop and straighten photos.
- Rotate a photo: Click the Rotate button in the toolbar to rotate the image counterclockwise. Option-click the button to rotate the image clockwise.
- To remove the changes, press Ctrl-Z or click Reset Changes.
3. To stop editing, click Done
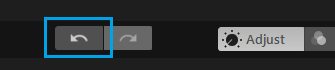
Tip: You can quickly remove changes to a photo. To undo the last change you made, click the button
To discard all changes and start over, click Reset Changes. If a photo was edited and saved previously, click Revert To Original to drop all changes and start over.