An Album is an organizational unit that holds multiple photos. The difference between Album and Event is more about the purpose of usage. Albums are intended to keep images of a specific topic that is not a life event. For instance, you may want to collect all photos of your pet in one place, but still, have them in Events. This could be achieved with Albums.
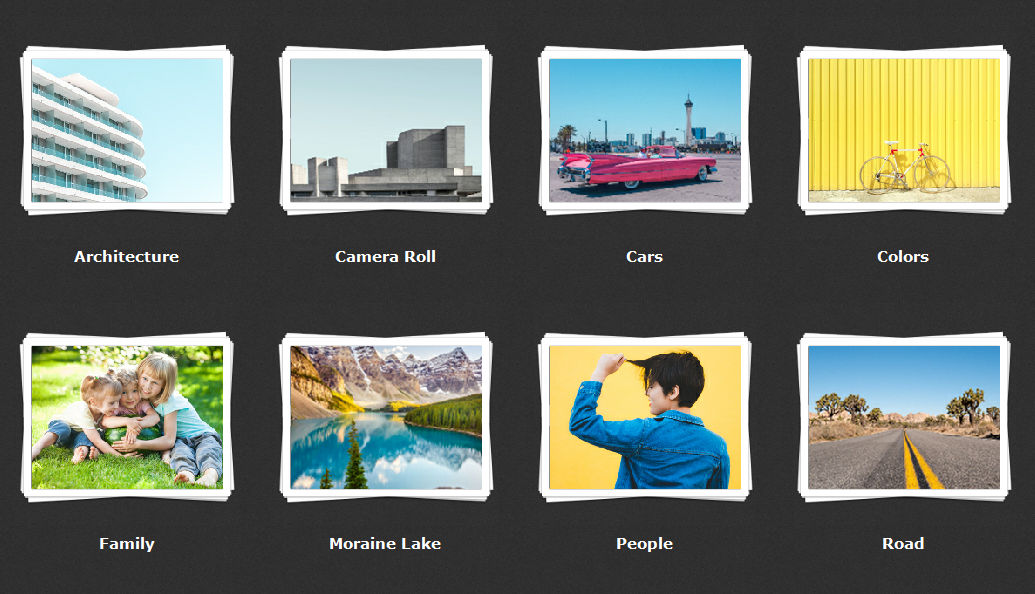
A photo may reside in an Event and an Album simultaneously. When you copy a photo from an Event to an Album, Phototheca does not copy files on disks and does not create duplicates. Albums only contain references to images, not physical copies. That’s why it’s safe to create as many Albums as you need, and you won’t waste a single byte of disk space.
Create an Album
There are a few ways to create an Album:
- Create an empty Album using the menu or a button
- Create an Album with content from a selection
- Create an Album from an Event
- Create an Album using drag-and-drop
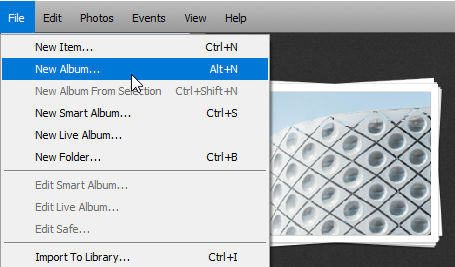
1. Create an empty Album using menu or button
If you want to start from scratch and make an empty Album, this can be done either by using menu File->New Album, or by clicking the button on the bottom bar and selecting the “Album” page of the dialog that pops up.
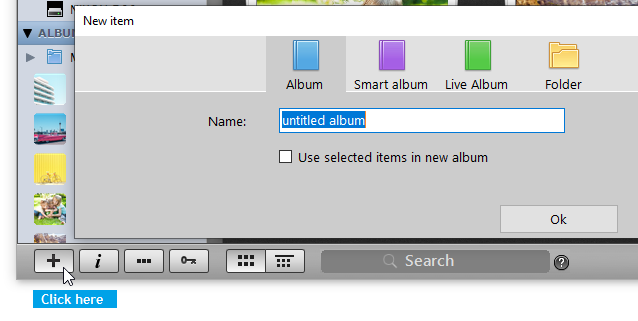
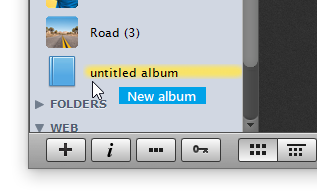
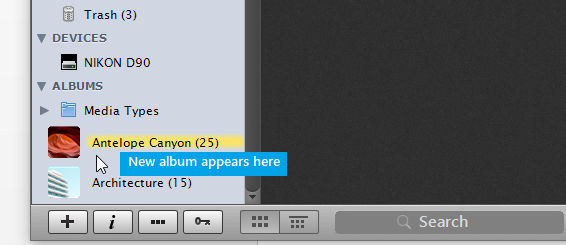
A new Album will be placed in the root of the “ALBUMS” section in the Library. It will have a default icon (blue book) and will be highlighted with yellow so you can find it quickly.
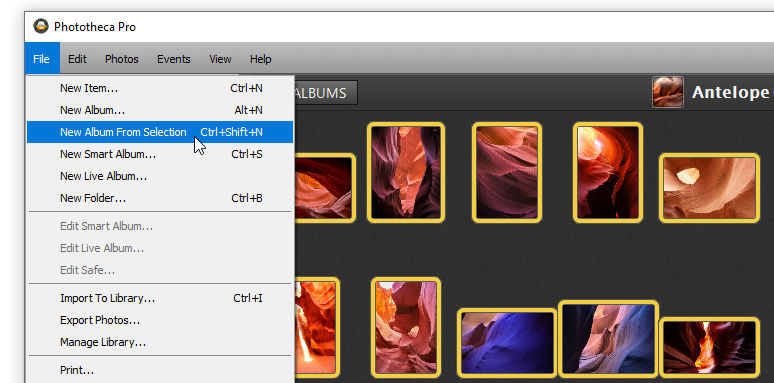
2. Create an Album with content from a selection
Using this tool you can create an Album that already has photos inside it. To make such an Album, just select the needed photos and click the File->New Album From Selection menu item.
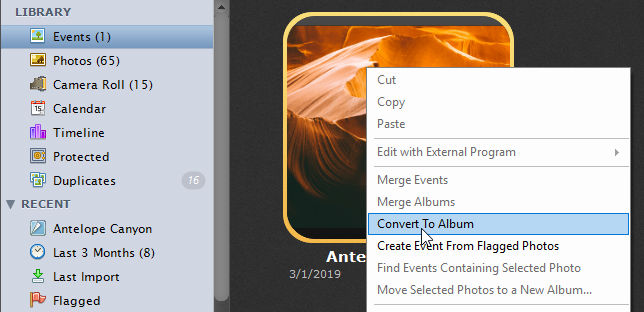
3. Create an Album from an Event
Any Event can be turned into an Album with a single click. Select an Event you would like turn into an Album, right-click with the mouse, and hit the “Convert to Album” context menu item. The new Album will appear under the “ALBUMS” section of the Library, and the original Event will be removed.
4. Create an Album using drag-and-drop
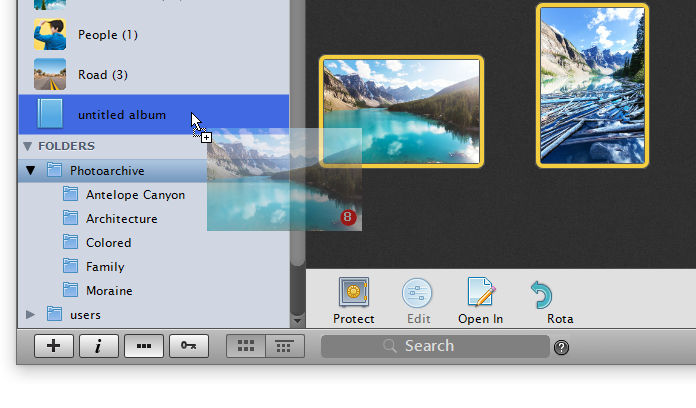
Select one or a few photos you want to put into a new Album. The photo you choose may reside anywhere – inside an Event, in another Album, picked out from the Calendar or selected from a search result, it does not matter.
Having selected the photos, drag any of them to the left pane where the Library is and drop on an empty area – this simple action will create a new Album with all the chosen photos, and the photos will not be moved from their original locations.
Fill an Album with content
If you started from scratch and have an empty Album, there are two ways to put content into it.
1. Drag and drop
Select one or more photos from anywhere, then drag any of the selected photos and drop on the target Album on the left pane – this action will add all the selected photos to the target album. Photos reside in their original locations, while the new Album references to them.
2. Cut and paste
If you want to move photos into an Album so they don’t stay where they are, use the cut-and-paste technique.
Select the needed photos, then right-click with the mouse and hit the “Cut” menu item. Then, navigate inside the target Album, right-click again, and hit “Paste.” The photos will be moved out from their original locations and moved into the target Album.
Phototheca operates with references to files, not real files, so files on a disk stay where they are.
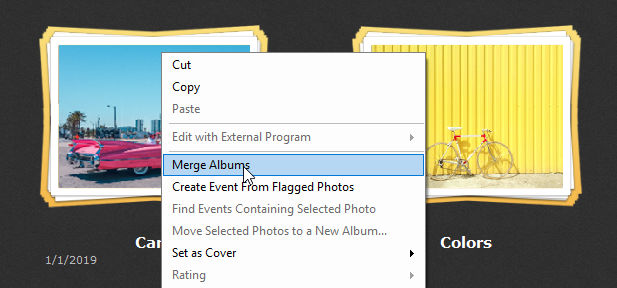
Merge Albums
If there is a need to merge two or more Albums into one single Album, just select them, right-click, and hit the “Merge Albums” menu item.
Move Albums
A common approach to Albums organization is to create a hierarchical structure with Folders for multiple topics and subjects and distribute Albums among them, grouped by subjects.
To achieve this goal, we need to be able to create a hierarchy of Folders and move Albums into them.
How to create and manipulate Folders is described on this page: Organize Folders
Here, we’ll learn how to move an Album into a Folder.
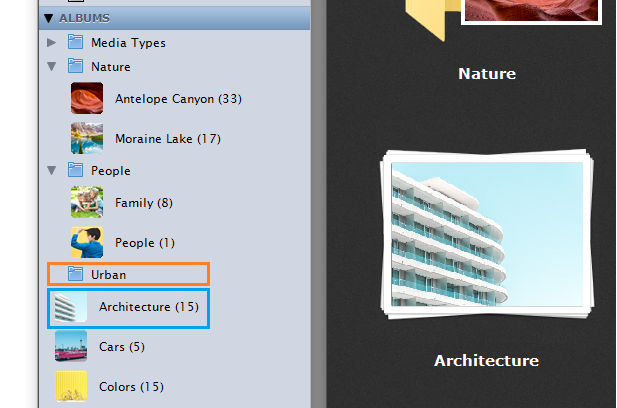
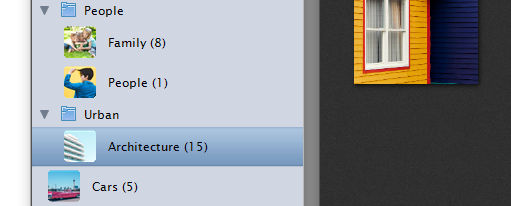
Let’s imagine we have a hierarchy of Folders and several Albums, as shown on this figure:
To move the Album “Architecture” into the Folder “Urban,” drag the Album with your mouse and drop it on the Folder:
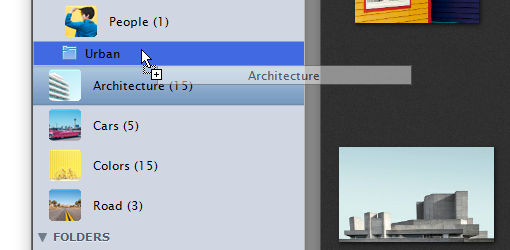
The Album will be moved inside the target Folder.
Another way to move an Album into the Folder is to select an Album in thumbnails view (central area), Cut, browse to the target Folder, and Paste.
Using this technique, you can build an organizational structure of any level of complexity with unlimited nested levels.