Phototheca’s Keywords panel gives all the needed tools to work with keywords: view keywords, search by keywords, and add, change and delete keywords.
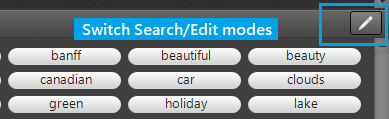
The first thing we need to know about the Keywords panel is that it works in two modes: Search mode and Edit mode. The current panel’s mode is always indicated in the panel’s title: “Keywords — Search” or “Keywords — Edit.” To switch between modes, click the button with the pen icon on the right side of the panel’s title:
Search Mode
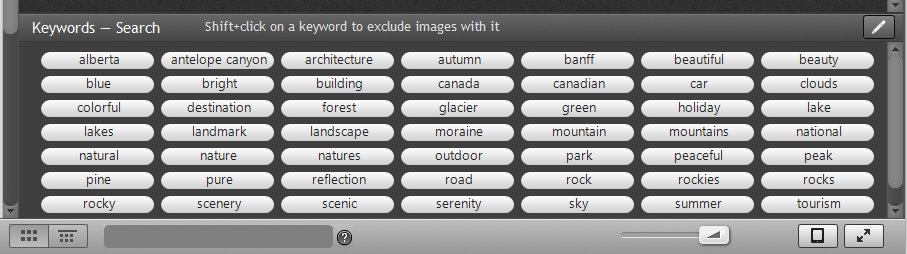
When the panel is in Search mode, it shows all the keywords in the Library and doesn’t depend on currently selected objects or locations. All the keywords of all photos are shown here.
To filter photos down to a specific keyword, click on the keyword, and immediately all photos in the entire Library that contain the clicked keyword are shown in the central view.
Click on a few keywords to narrow down the search to photos that contain ALL selected keywords. There is no way to filter photos that contain ANY clicked keywords using the Keywords panel, but you can use Smart Albums to achieve that.
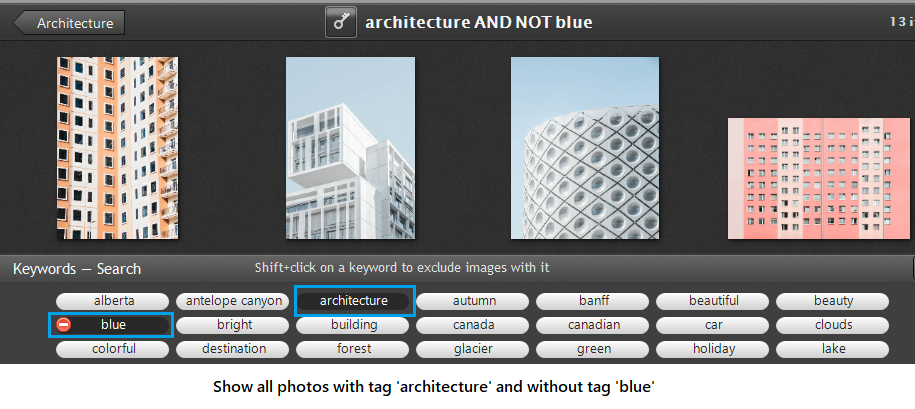
Within Search mode, it’s possible to filter down photos that do NOT contain a specific keyword: hold the Shift key and click on a keyword to bring up all photos that don’t have it.
Edit Mode
Edit mode depends on the context and requires photos to be present in the central view. For example, if you only have Events or Albums in the current view, then Edit mode won’t work correctly. Get into an Event, an Album, or another item, so you have photos in front of you.
The next important thing about Edit mode is that if there are no selected photos in the current view, it works like “ALL” photos are selected, and any change will be applied to all photos in the current view. In other words, no selection = everything is selected.
When in Edit mode, the Keywords panel consists of two areas: present keywords and suggestions.
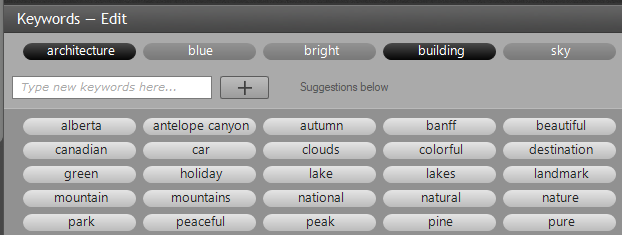
Present keywords
The present keywords area shows all keywords of selected photos of the current view (if nothing is selected, then it’s all photos of the current view). A keyword can have either a dark background or gray background.

A dark background means that a keyword is present on each photo of the selection, and gray means some but not all photos have the keyword.
Point the mouse over a dark keyword, and an icon with a minus sign appears on the right side, meaning if you click on the keyword, it will be removed from all photos that have it.

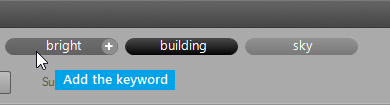
Point the mouse over a gray keyword, and an icon with a plus sign appears on the right side, meaning if you click on the keyword, all photos that don’t have the keyword will be tagged with it, and the keyword turns from gray to dark. If no photos are selected in the current view, the keyword will be added to all photos in the view.
A textbox below the keywords with a list of keywords allows you to enter any specific keyword and tag selected photos with it. It’s possible to enter multiple keywords separated with a comma:
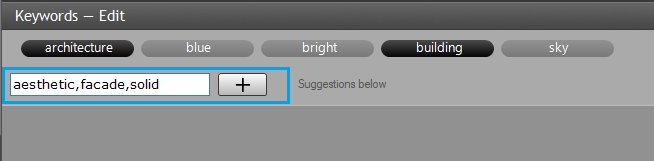
Hit Enter or click the button on the right side to start tagging photos with a new keyword.
Suggestions
The second part of the Keywords panel is the list of suggestions – keywords present in the Library but belong to other photos that aren’t in the current view.
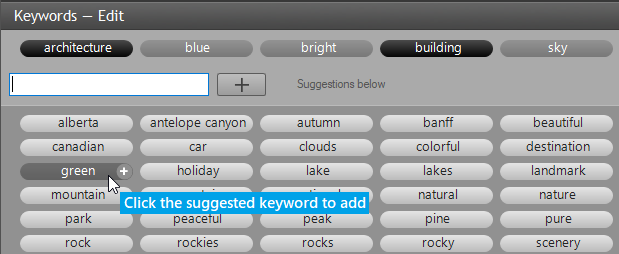
Click on any of the suggested keywords to tag all selected photos with it. The list of suggestions shortens while you type a keyword in the textbox, so if a keyword is somewhere deep in the list, it pops up after a few characters are.
Replace a keyword in one step
If you need to replace a keyword with a new one, instead of deleting the old and adding a new one, you can replace any keyword with another one in one step. Right-click on a dark or gray keyword and hit the “Change keyword …” menu item – the dialog pops up asking for a replacement for the clicked keyword.
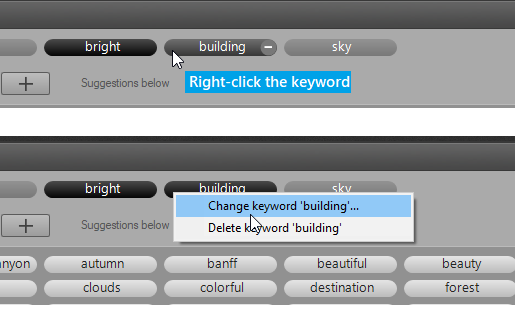
Enter a new keyword and click OK to replace the old keyword with the new one for all selected photos.