A Smart Album automatically gathers and displays photos in your Library that meet criteria you specify.
Let’s say you want to gather all photos that are made by a specific camera into a single album – you create a Smart Album with the criteria “Camera model” and set the exact model. Or, for example, you can create a Smart Album that automatically collects any photos that have the keyword “kids.”
Create a Smart Album
- Choose “File → New Smart Album…” from the Phototheca menu or use keyboard shortcut Ctrl+S
- In the subsequent dialog, give your Smart Album a name.
- Use the dropdown menus to specify the criteria a photo must meet to be picked for this Smart Album. For instance, if you’ve just returned from a vacation and want to create an album of all your holiday snaps, then you could make criteria to include all photos taken during the period of vacation. You can set one condition or many.
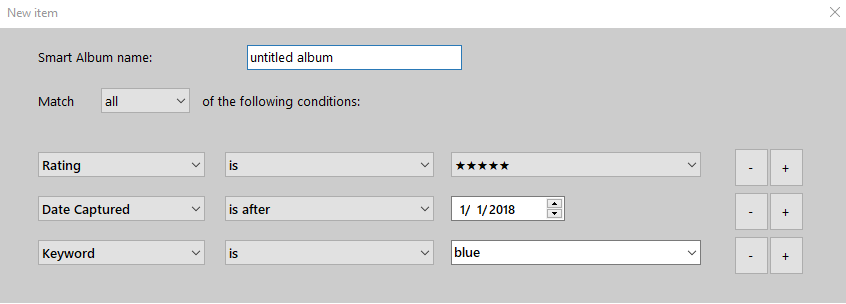
- You can add more conditions to your Smart Album, by clicking the “+” button and then using the subsequent dropdown menus. If you’ve created two or more conditions, a new dropdown will appear where you can choose whether a photo must meet all of these conditions or any of these conditions.
- When everything looks right, click “OK.”
Your new Smart Album appears with your other albums.
From now on, Phototheca will automatically update your Smart Album, adding new photos that match the criteria and removing photos that no longer match.
Change the criteria for a Smart Album
- Select the Smart Album.
- Choose “File → Edit Smart Album.”
- Make your changes, then click OK.
Conditions You Can Choose
There are plenty of different kinds of data that you can use to build a smart album, including:
- Album name
- Event name
- The date the image was taken
- The date the file was imported
- Description text you entered
- Faces identified in an image
- The name of the original file
- The location of the original file on the disk
- Keywords
- If an image has been edited
- If an image has a duplicate
- If an image is flagged
- If a file is a movie(video file)
- Title text you entered
- Rating of a photo
- File type (image, movie, raw)
- Media type (HDR, panorama, portrait, video)
- If an image has been shared to Web
- Model of camera
- If the camera flash was used
- Type of lens used
- Camera settings, including aperture, focal length, ISO, and shutter speed
Use different cameras? Filter photos based on camera
Most of us take a lot of photos using smartphones, but you may also own a stand-alone camera.
By default, all of the photos in Phototheca are displayed alongside one another, regardless of whether you took them using iPhone or your top-of-the-range Nikon camera. Having your favorite, high-definition shots of beautiful scenery, mixed up with blurry smartphone photos of the family cat sleeping in funny positions, can be annoying!
If you regularly take photos using multiple cameras, then one of the easiest ways to organize your photos is to automatically sort them into separate albums, based on the camera:
- Select “File > New Smart Album…” from the Phototheca menu bar.
- Give your Smart Album a name.
- Open the first dropdown, and select “Camera Model.”
- Open the second dropdown, and select “is.”
- Open the third dropdown; you should now be able to choose between all the cameras you’ve used to take the current images in your Library.
Finding faces
If you spend a little time training Photothecas’ facial recognition feature, you can have face tags on images and stacks of people photos on the corkboard in Phototheca. Since then, you can create a smart album that includes the criteria “Face” and “is,” and then select a face tag from the list.
If you want to have a Smart Album that pulls photos with a few specific persons on it, then add other criteria that include “Face” and “is” and pick another face tag from the dropdown. Repeat until you include all the people you want in the album.