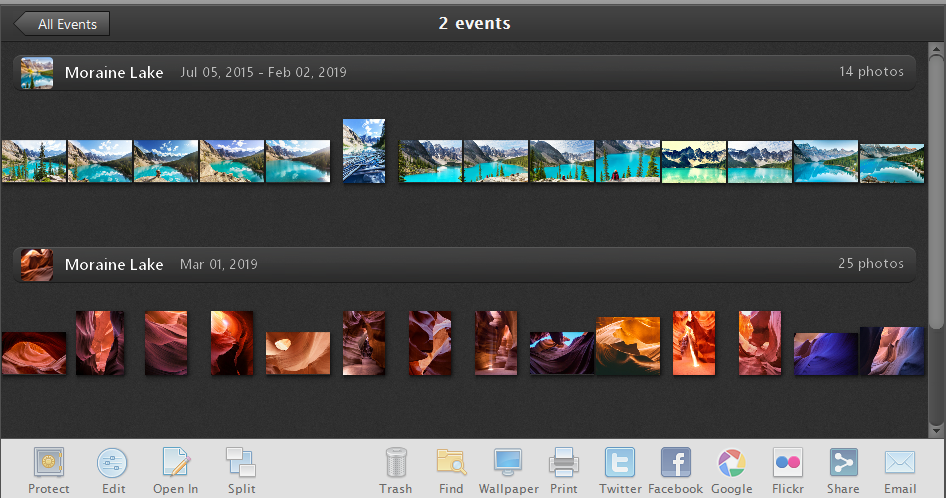
Events are the entry point for how photos get into Phototheca. When you import images and videos, they are immediately arranged into groups and appear as Events in the Library. Phototheca can combine multiple images into a single Event in a few different ways. Have a look at the topic Events creation strategy for details on how images from disks are composed into Events.
Let’s say we select the simplest import strategy: One folder on a drive equals one Event in Phototheca. A lot of users try to keep photos in folders grouped by an occasion or common topic on a drive, so this can easily be reflected in Phototheca. After folders with photos are imported, we end up having dozens or even hundreds of Events in the “Events” section of the Library.
Depending on whether or not you organize your photos on disks into appropriate folders with meaningful names or not, we can have two situations: either all Events correctly reflect life moments and occasions, or we have a bunch of Events with freaky names like “DSC001,” “New folder,” “Folder (1),” and so on.
If you follow the first method and keep well-organized and structured folders on your hard drive, you probably won’t need to work more with Events and can proceed to the next topic of this guide.
Otherwise, let’s see Phototheca’s tools can help you organize images and Events.
The basic approach to converting a mess of freaky Events into a beautiful photo Library where everything is in place, easily accessible, and doesn’t fall into the cracks is to work through every single Event one by one.
Generally, there are four unwanted scenarios of how photos might be arranged into Events:
- An Event contains the correct photos of a single, meaningful moment in life but just has a freaky name.
- An Event contains photos of multiple life moments, not just a single moment.
- An Event contains only part of a life moment and other parts are scattered over a few other Events.
- An Event contains something that is totally not a life moment, but rather is a collection of random images, a design project, graphic materials, or mood board images
Phototheca gives you tools to deal with each of these cases and to correct the issue. Let’s tackle them one by one.
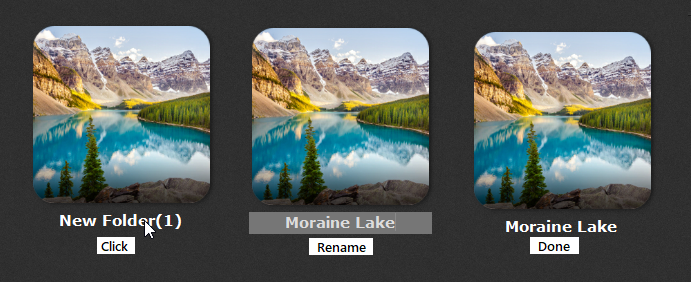
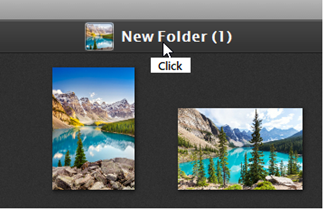
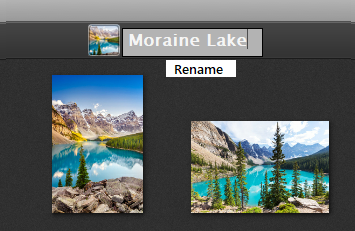
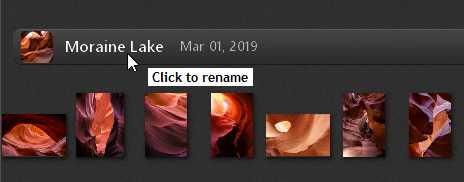
1. Rename Event
An Event contains the correct photos of a single, meaningful moment in life but just has a freaky name
Here you only need to rename the Event. An Event can be renamed either with a mouse click on the title beneath the Event when you overview an Event, or by clicking on the title bar when you are inside the Event.
2. Split Event
An Event contains photos of multiple life moments, not just a single moment
In this case, you need to use the Split tool to split an Event into two or more granular Events.
Let’s imagine we have a few series of photos belonging to different life moments and they show up one after another inside a single Event.
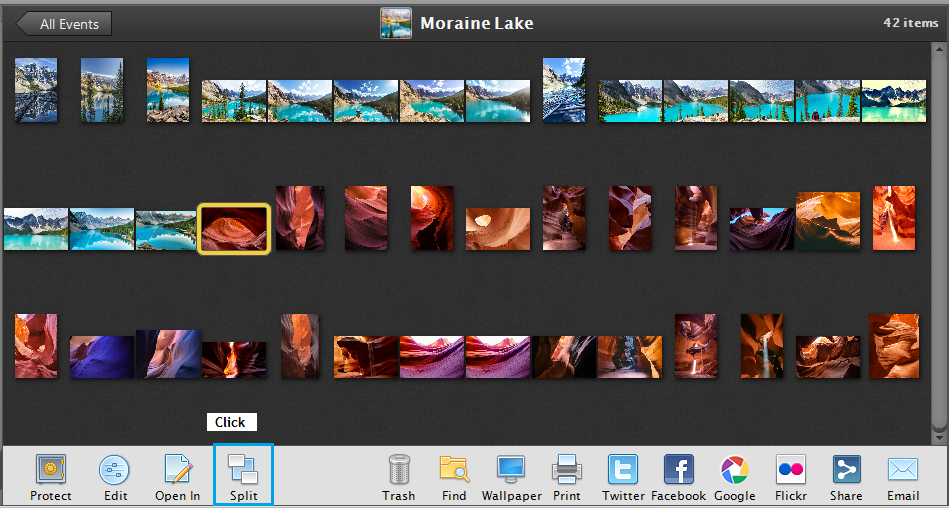
Use the Split tool like this: First, select the first photo of the second series (second life moment) and click “Split.” All the photos starting from the selected one and until the end of the Event will be broken apart and appear beneath the current Event as a separate Event with the same name. See the following figure:
At this point, we have two Events. The first life moment is isolated in the original Event, and all other photos are moved into another Event. If you had two life moments that were merged in the single Event, you’ve now separated them into two Events. Just rename the second Event to reflect the life moment and you are done!
Click the Event header to rename an Event.
If there are more than two moments inside the Event, just continue to split: Select the first photo of another series and hit “Split” again. Repeat this as many times as necessary to separate all the series into single Events. Be sure to give meaningful names to each of them.
Congratulations, you’ve completed your first split.
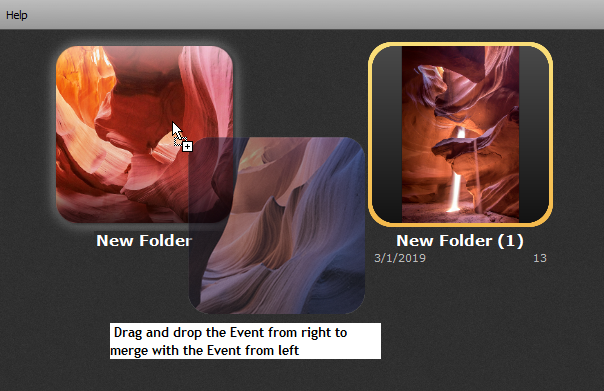
3. Merge Events
An Event contains only a part of a life moment and other parts are scattered over a few other Events
This case is opposite of the previous case. Here we have a single life moment that is scattered over several Events.
The Merge tool will fix this issue. First, identify all Events containing parts of a life moment. Then, staying in the “Events” section of the Library, select all those Events by holding the Ctrl key and mouse-clicking on each of them. A selected Event has a yellow border.
When all necessary Events are selected, hit the “Merge” button. The content of multiple Events is immediately moved into the first Event and the other Events disappear. The life moment is now consolidated into a single Event, as it’s supposed to be.

There’s another way to merge two Albums with a mouse: Just drag an Event and drop it on another one – the Events will be merged.
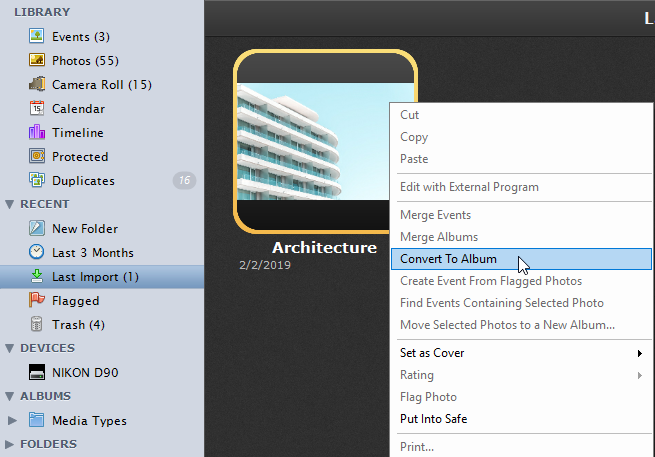
4. Convert to Album
An Event contains something that is totally not a life moment, but rather is a collection of random images, a design project, graphic materials, or mood board images
If you have a folder with images that are not a life moment, then it doesn’t make sense to keep them inside an Event. Phototheca has another organizational unit for these images: the Album. It would be more logical to move these photos from Event to Album and throw an empty Event away. In other words, convert the Event to an Album.
Phototheca has a tool to make this conversion. Select an Event, right-click with the mouse, and hit the “Convert to Album” menu item. Immediately, the Event disappears and a new Album appears under the “Albums” section of the Library with all images inside.
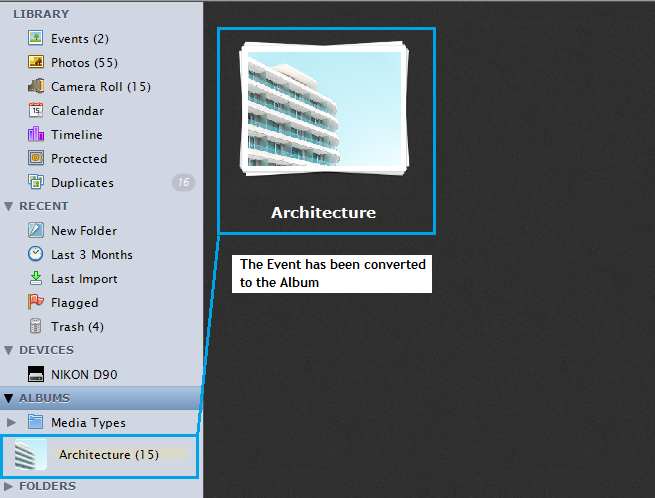
The general rule: Keep images that are not life moments in Albums. Albums can be organized into sophisticated, hierarchical structures with Folders, allowing you to build your own hierarchy as you need it.
Find an Event
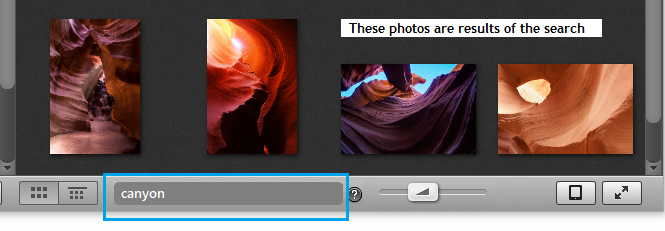
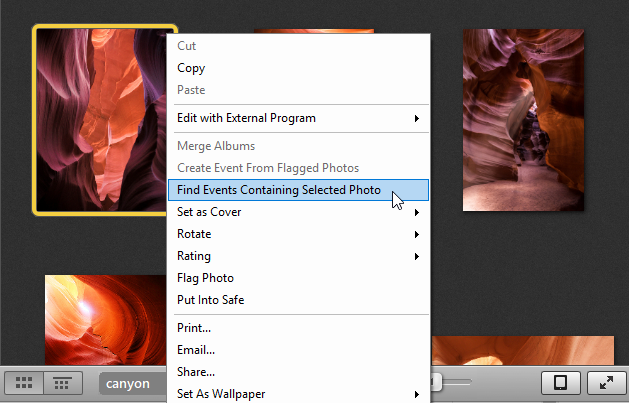
This feature lets you find an Event that contains any specific photo. Let’s say you find a photo using the Search console or the Keywords panel, have a photo in front of you, and next you want to find the Event that contains this photo. It’s like a reverse search.
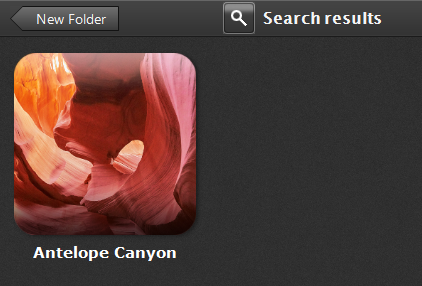
To find a needed Event, right-click with the mouse on the photo and hit the “Find Events Containing Selected Photo” menu item. Immediately, the view area is cleared and the needed Events appear there.
Just a reminder – every photo can have one parent Event only, as was described here: Basic Concepts, Event